Overview
Staying connected is important. The SUNY Oswego campus network provides networking services in support of the educational mission of SUNY Oswego. It is the responsibility of each campus community member to use these services appropriately and in compliance with all campus, local, state, and federal laws and regulations. This article will highlight locations and instructions for connecting your devices to the networks.
See Wireless FAQ for general information and requirements.
UPDATE STARTING FALL 2025
The Oswego-Gaming-RES network will be eliminated. Gaming devices and smart TV's will now connect to the Oswego-Guest-RES network. Registration is still required for wireless gaming devices.
SUNY Oswego has installed many wireless network access points across campus. Various academic, residential and outdoor spaces have coverage. Below are locations around campus and their associated networks.
Academic and Administrative Buildings
- All classrooms, offices, and public gathering areas.
- Networks: Oswego-Secure and Oswego-Guest
- All living spaces, gathering areas/lounges, dining areas, and staff offices.
- Networks: Oswego-Secure-RES, Oswego-Gaming-RES, and Oswego-Guest-RES
Outdoor Areas
- Rich/Sheldon/Park Quad, Lanigan/Hewitt/Penfield Quad, Tyler/Mahar/Hewitt Quad, Lee/Shineman Gardens, Lee north grass fields, Laker turf field
- Networks: Oswego-Secure and Oswego-Guest
Wireless Instructions
Using the SUNY Oswego wireless network requires a one-time configuration necessary to set up your device for secure access. Connect to the academic or residential wireless network on a PC, Mac, Android, or Apple device using your Laker NetID and password.
Gaming devices, including smart TVs, gaming consoles, and streaming devices, will need registration at mydevices.oswego.edu. Submit a ticket with CTS to set up a wired connection in Oneida and Funelle Halls. Other wired connections in the residential dorms do not need network activation. See the important steps to take for residential gaming devices below for more information.
If you are unable to log in, try to forget the network and reconnect. See our Troubleshooting articles for more assistance or contact the CTS Help Desk.
Note: instructions may very depending on your model and version. Refer to your device manual for assistance.
Oswego-Secure and Oswego-Secure-RES:
-
-
From your Home screen, go to Settings, then tap Wi-Fi.
-
Tap to turn on Wi-Fi. Your device will automatically search for available Wi-Fi networks.
-
Tap the name of the Wi-Fi network that you want to join. You might be asked to enter the network's password first, or agree to the terms and conditions.
-
Look for the blue checkmark next to the network name, and the Wi-Fi icon in the upper corner of your screen. This means you're successfully connected.
-
- Ensure to trust the network certificate.

-
Go to your Settings and tap Network & Internet or Connections. From the list, tap Wi-Fi.
-
Select Oswego-Secure or Oswego-Secure-RES from the list of available networks to connect to.
-
When prompted to, enter these settings. (Some settings you won't need to change.
-
| EAP Method |
PEAP |
| EAP Phase 2 Authentication |
MSCHAPv2 (on Samsung devices, you'll need to tap Advanced to change this setting) |
| Server CA Certificate |
Not Needed or Use System Certificates |
| Domain |
oswego.edu |
| Identity |
[Your Laker NetID] |
| Password |
[Your LakerApps Password] |
-
-
-
-
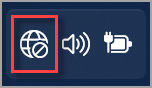
Select the Network, Sound, or Battery icons on the taskbar to open quick settings.
-
The Disconnected icon appears when you’re not connected.
-
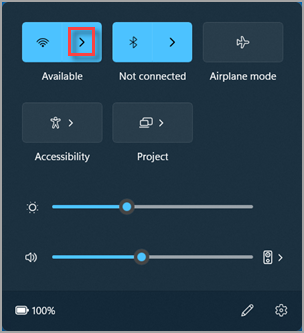
On the Wi-Fi quick setting, select Manage Wi-Fi connections.
-
Choose the Wi-Fi network you want, then select Connect. If you don't see the network you expect, you can manually start a new Wi-Fi scan by selecting the Refresh network list button in the lower right.
-
Type the network password, and then select Next.
-
- Configure the WiFi settings as below:
-
| EAP Method |
PEAP |
| EAP Phase 2 Authentication |
MSCHAPv2 |
| Server CA Certificate |
Not Needed |
| Domain (Not on all Chrome OS Versions have this listed) |
oswego.edu |
| Identity |
[Your Laker NetID] |
| Password |
[Your LakerApps Password] |
-
Raspberry Pi and other devices on the Linux operating system will require a supplicant configuration by following either of these instructions:
-
How to Connect to 802.1x Enterprise WiFi on Raspberry Pi
When you are trying to connect to 802.1x WiFi with WPA enterprise on Raspberry Pi, you will see the WiFi access point is greyed out on Raspberry Pi, like below. It is because Raspberry Pi is using the simple network service on the GUI, which doesn't support enterprise WiFi. However, Raspberry Pi supports 802.1x enterprise WiFi. And the simplest way to set up the connection to 802.1x enterprise WiFi on Raspberry Pi is to use the standard Linux network manager to replace the simple network service. In this tutorial, we will walk through how to set it up.
- Open the terminal window on Raspberry Pi, and run the following commands to get the standard Linux network manager installed.
sudo apt install network-manager network-manager-gnome
sudo systemctl disable --now dhcpcd
sudo systemctl enable --now network-manager
sudo reboot
Explanation:
1st line is to install the Linux network manager
2nd line is to disable the DHCP, because DHCP will not work with the network manager
3rd line is to enable the network manager service
Last line is to reboot the device.
- After rebooting the device, you will be able to see a new network icon, click on the icon, you will not be able to connect to the 802.1x enterprise WiFi.
- Then fill in the information as you normally do with 802.1x enterprise WiFi connection, and you will now be able to connect to the network.
- Configure the WiFi settings as below:
-
| EAP Method |
PEAP |
| EAP Phase 2 Authentication |
MSCHAPv2 |
| Server CA Certificate |
Not Needed |
| Domain (Not on all Chrome OS Versions have this listed) |
oswego.edu |
| Identity |
[Your Laker NetID] |
| Password |
[Your LakerApps Password] |
- That's it! You're ready to go.
Note: To download and install the network manager, you will need an internet connection first. Please consider having it connected to a wired network or another normal WiFi network first to get it set up.
-
-
Press the Home button on your Roku remote
-
Go to Settings > Network > Set up connection
-
Choose Wireless (if you are using an Ethernet cable, choose Wired)
-
If using Wi-Fi, pick your network and enter the password
-
Smart TV
- Refer to your user's manual for instructions. Look for a "Network Settings" or similar option in your TV's settings menu.
-
-
- See below for how to register your Xbox, then use the Xbox link for instructions on how to connect.
-
-
Select this link for Instructions.
- See below for how to register your PlayStation, then use the PlayStation link for instructions on how to connect.
-
Please note that the following devices are not allowed to connect:
- Kindle and Nook e-ink devices
- mDNS devices
- Printers, including 3D Printers, and wireless document scanners are strictly prohibited on the campus residential wired or wireless networks. USB connections are allowed and encouraged.
- Network devices such as routers, access points, hubs, switches, wireless extenders, etc, are strictly prohibited on the campus residential wired or wireless networks.
- Unfortunately, we do not support common smart home devices, including but not limited to, IP cameras, smart light bulbs and lights, plugs and clocks, wireless speakers, the Amazon Echo or Alexa, Google Home, Apple HomePod, Chromecast devices, or other devices.
Important Steps to Take for Residential Gaming Devices and Smart TVs
Gaming Consoles, Smart TV's, and streaming devices (including Roku’s, Apple TVs, Fire Sticks) need to be registered before joining and accessing Oswego-Guest-RES
Register Your Device
How to Register your Device
I have an Ethernet port in my dorm room. Can I use that?
- Yes, your Ethernet port will need to be activated by CTS if you are in Funelle or Oneida Halls, and your device will need to be registered. Please provide CTS with your building and room # and the Access Point(AP) alpha-numeric code from your ceiling.
- If you find the ethernet port is not allowing the connection, please contact CTS with the ethernet port number and color, your dorm room number and building, the wired mac address and the solutions you have tried.
Note: Laptops, Smartphones, Chromebooks and Tablets do not need to be registered.
Unfortunately, none of these networks support wireless speakers, the Amazon Echo or Google Home, wireless printers, Chromecast devices, or common smart home devices like smart light bulbs.
Use the wired network for devices with an Ethernet port that don’t move (e.g., a dock for your laptop, a desktop computer, or a gaming console) or devices for which you need a very fast internet connection (e.g. gaming computer).
Here are instructions for how to connect Windows to the wired Oswego network.
Residential Buildings
-
Submit a ticket with CTS to set up a wired connection in Oneida and Funelle Halls. Provide your building and room#, network port name, and port color. Other wired connections in the residential dorms do not need network activation.
-
Next, register your device in the MyDevices Portal.
-
Wait 1 hour, then connect with your Laker Net ID (your email address without "@oswego.edu") and password.
Academic and Administrative Buildings
Only managed university computers can connect to the wired network in academic and administrative buildings. University desktops and laptops enrolled in Endpoint Management (Active Directory, SCCM, or Jamf Pro) receive the required 802.1x configuration settings that will support wired network authentication. Laker NetID authentication may occur during login or with a user prompt.
Eduroam (education roaming) is a secure, worldwide roaming access service developed for the international research and education community. This service gives faculty, staff and students the ability to connect to the internet while visiting schools within the Eduroam system. More information on the schools participating in Eduroam can be found here.
Note: eduroam is strictly a guest network. SUNY Oswego faculty and staff will not be able to access certain applications through this network like Banner and R25.
Note: It is strongly recommended that you configure your device at SUNY Oswego before traveling to another school within the eduroam network.
Note: If you are having trouble with your login credentials, please contact your institution for help.
Use the below credentials and settings to connect to EDUROAM and be sure to use your full school email address:
| EAP method: |
PEAP |
| Phase 2 authentication: |
MSCHAPV2 |
| Identity: |
You FULL school email address |
| Password |
Your email password
|
- Click Continue if a "Verify Certificate" pop-up appears. Click Connect if a "Continue connecting?" message appears.
- For MAC users enter your computer's administrative password when prompted.
- For iOS devices click Accept to continue connecting to the network.
Need Help?
Need additional information or assistance? Contact CTS.