Overview
This Guide Explains How To Use Secure Print On A Windows Machine And Release The Job At The Printer Control Panel.
Troubleshooting
Operation procedure: Performing secure print
-
Open the file in the application, and click [File]. Then click [Print] from the menu.
-
Select this product from [Select Printer] (or [Printer Name]) then click [Preferences] (or [Properties]).
-
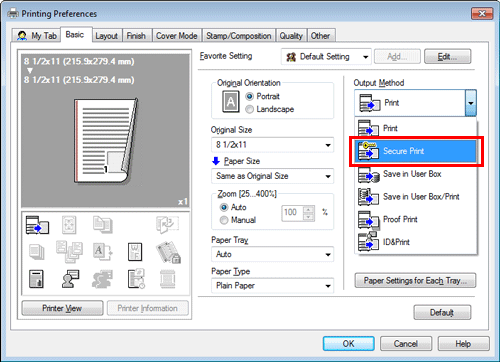
In [Output Method] on the [Basic] tab, select [Secure Print].
-
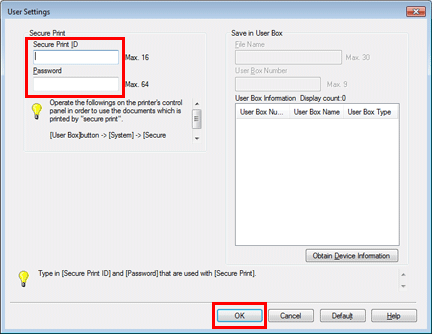
Enter the [Secure Print ID] and [Password], then click [OK].
-
Click [OK].
-
Click [Print].
Operation procedure: Printing a secure document using the Control Panel of this machine
-
Tap [User Box] and select [Secure Print] from [System].
-
Enter the ID and password for the secure print document, then tap [OK].
-
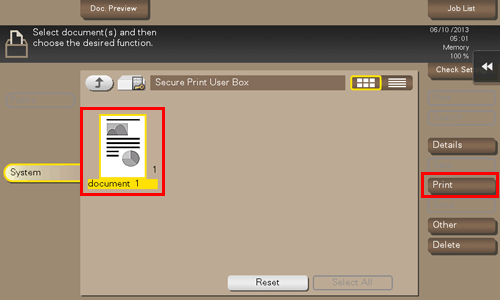
Select a secure print document, then tap [Print].
-
Change the print settings as necessary, and press the Start key on the Control Panel.
The secure print document is printed and automatically cleared from the Secure Print User Box.
Operation procedure: Performing ID & Print operation
-
Open the file in the application, and click [File]. Then click [Print] from the menu.
-
Select this product from [Select Printer] (or [Printer Name]) then click [Preferences] (or [Properties]).
-
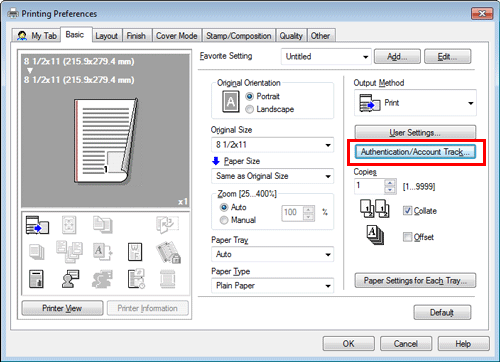
On the [Basic] tab, click [Authentication/Account Track].
-
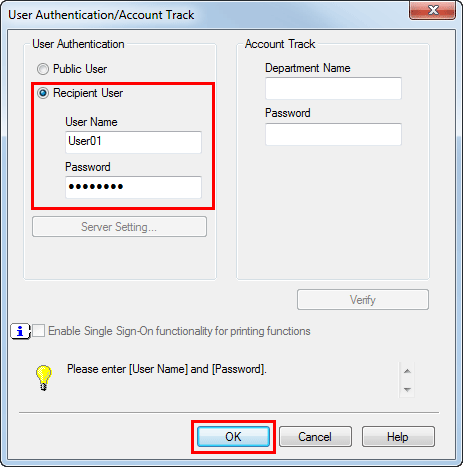
Select [Recipient User], enter the [User Name] and [Password] that are registered with the machine, then click [OK].
-
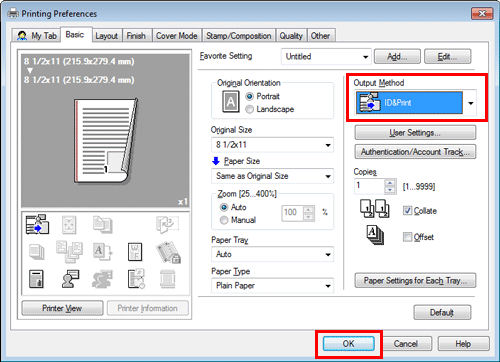
Select [ID&Print] from [Output Method], then click [OK].
-
Click [Print].
Operation procedure: Printing after user authentication on the machine
-
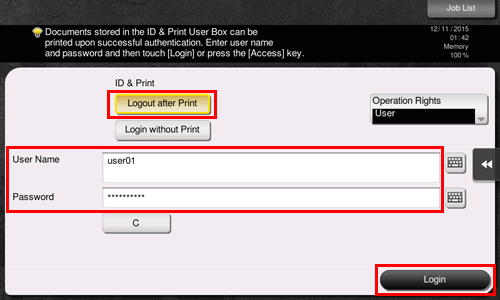
Select [Logout after Print], enter your user name and password, then tap [Login].
After successful user authentication, the file is printed.
Additional Information
Need additional information or assistance? Contact CTS.